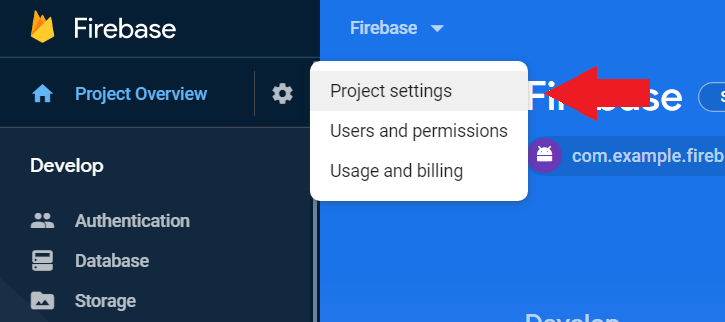
Set Up
In Android Studio go to Tools > Firebase.

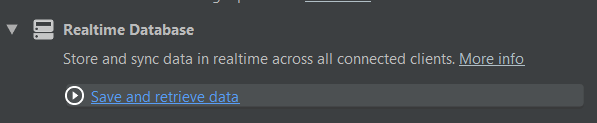
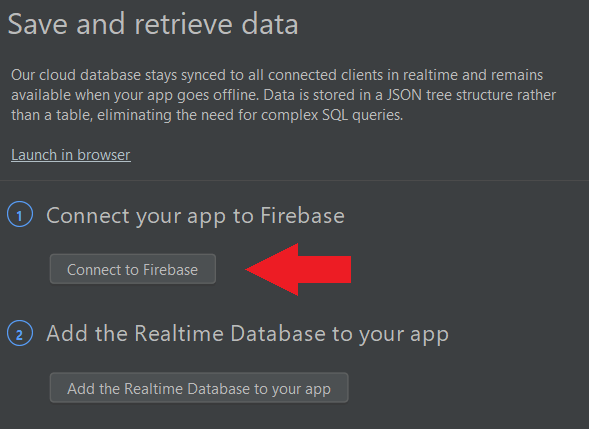
A panel will pop out on the right. Next go to Realtime Database and click on “Save and retrieve data”.
Next, Click on “Connect to Firebase”.
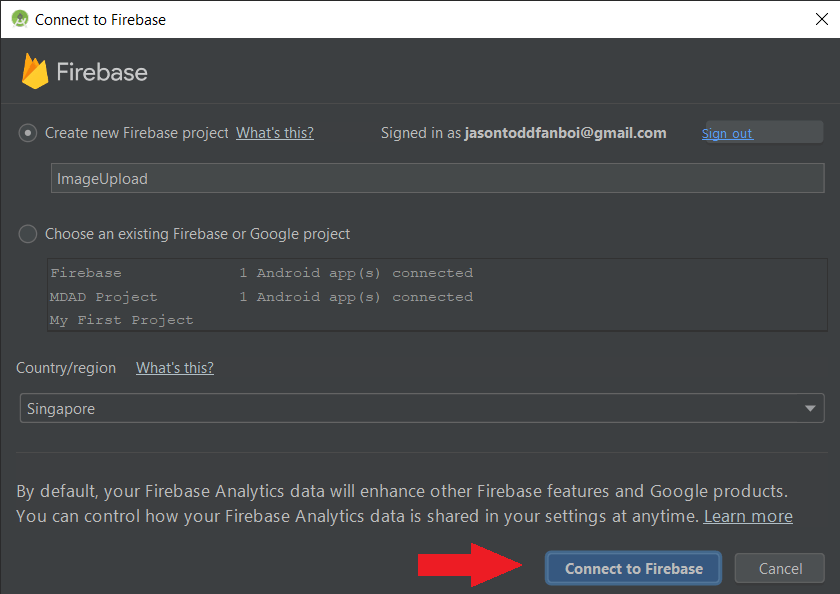
This window will pop up. Leave everything as it is and click on “Connect to Firebase”.
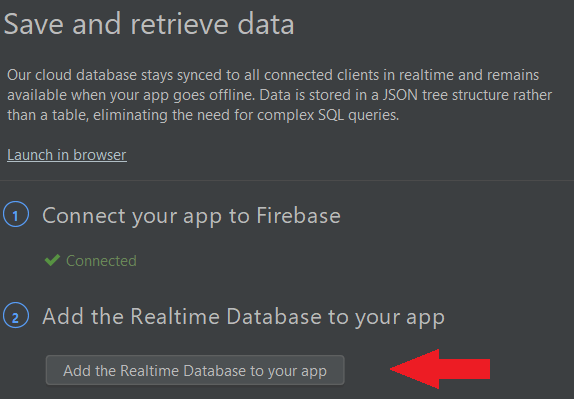
Under the same tab, click on “Add the Realtime Database to your app”.
A window will pop up, and click on “Accept Changes”. If you go to https://console.firebase.google.com/, you should be able to see your project.

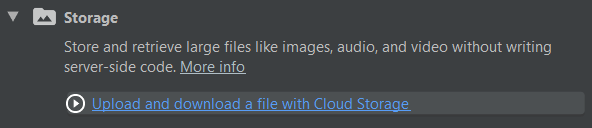
Heading back to Android Studio, go back to the first page of the Firebase panel and go to Storage and click on “Upload and download a file with Cloud Storage”.
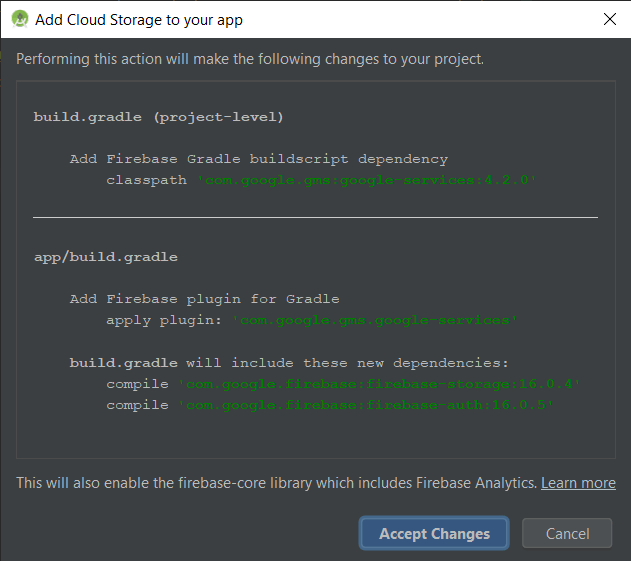
Next, click on “Add Cloud Storage to your app”.

This window will pop up prompting you to add all the different dependencies that are needed. Click on “Accept Changes” to continue.
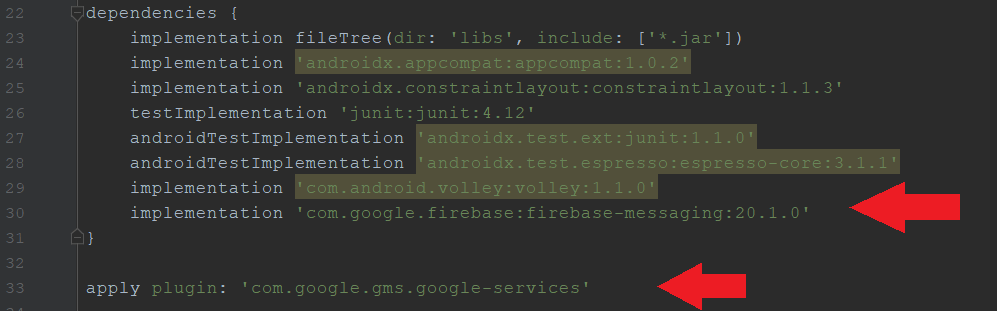
Next, go to your app-level build.gradle. This is under Grade Scripts > build.grade(Module: app). You should see these 2 new lines added to it.
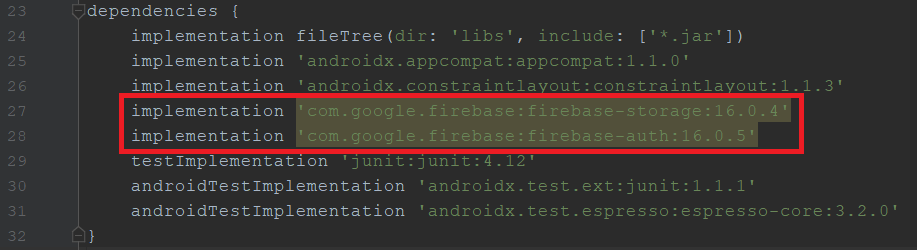
Under the same section, you want to add 1 more dependency.
implementation 'com.squareup.picasso:picasso:2.71828'After doing so, click on “Sync Now” at the top right corner of Android Studio. You are now done with the set up!
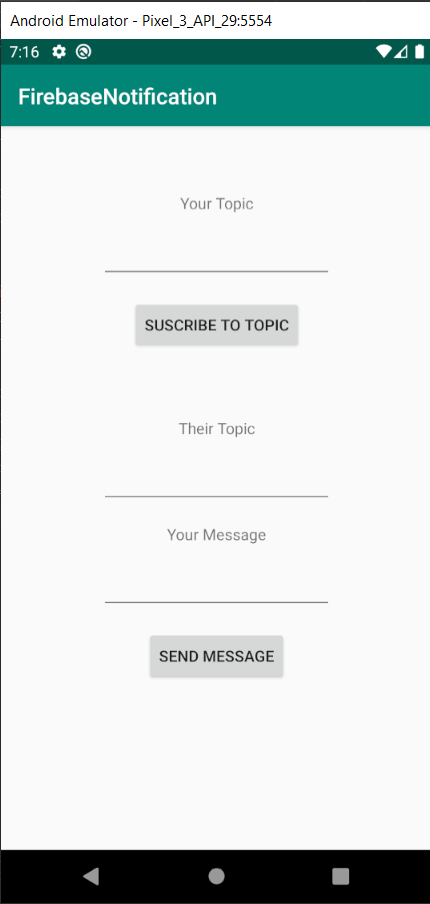
Layout
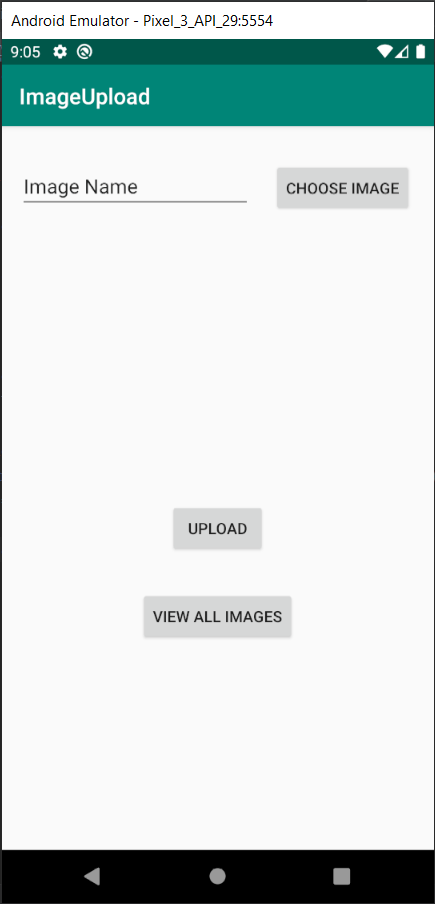
I made this layout to upload images. You should have a similar setup consisting of:
- an EditText for your image name
- a Button to choose your image from gallery
- an ImageView (it is empty right now) to show the image you are uploading
- a Button to upload your image
Choosing Image from Gallery
With this following code, you should be able to choose an image from your gallery, and the chosen image will show in your ImageView. There is a brief explanation in the commented lines so look out for those.
package com.example.imageupload;

import androidx.appcompat.app.AppCompatActivity;

import android.content.Intent;
import android.net.Uri;
import android.os.Bundle;
import android.view.View;
import android.widget.Button;
import android.widget.EditText;
import android.widget.ImageView;

import com.squareup.picasso.Picasso;

public class MainActivity extends AppCompatActivity {

    EditText etImageName;
    Button btnChooseImage, btnUpload, btnViewAll;
    ImageView imgToUpload;

    //Declare these 2 variables
    private static final int PICK_IMAGE_REQUEST = 1;
    private Uri mImageUri;

    @Override
    protected void onCreate(Bundle savedInstanceState) {
        super.onCreate(savedInstanceState);
        setContentView(R.layout.activity_main);

        etImageName = findViewById(R.id.etImageName);
        btnChooseImage = findViewById(R.id.btnChooseImage);
        btnUpload = findViewById(R.id.btnUpload);
        btnViewAll = findViewById(R.id.btnViewAll);
        imgToUpload = findViewById(R.id.imgToUpload);

        //setOnClickListener for your button to open gallery and choose image
        btnChooseImage.setOnClickListener(new View.OnClickListener() {
            @Override
            public void onClick(View v) {
                openFileChooser();
            }
        });
    }

    //method to open gallery
    private void openFileChooser() {
        Intent intent = new Intent();
        intent.setType("image/*");
        intent.setAction(Intent.ACTION_GET_CONTENT);
        startActivityForResult(intent, PICK_IMAGE_REQUEST);
    }

    //this method will set ur ImageView to the image you chose
    @Override
    protected void onActivityResult(int requestCode, int resultCode, Intent data) {
        super.onActivityResult(requestCode, resultCode, data);

        if (requestCode == PICK_IMAGE_REQUEST && resultCode == RESULT_OK
                && data != null && data.getData() != null) {
            mImageUri = data.getData();

            Picasso.get().load(mImageUri).into(imgToUpload);
        }
    }
}
If you did this part correctly, it should look something like this.
Uploading Image to Firebase
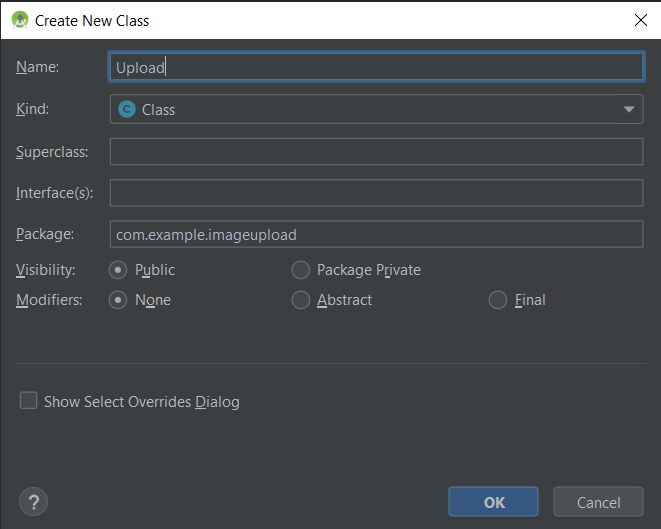
Next, we are going to actually upload your selected image to Firebase. Firstly, create a new Java class called Upload.java. To do this, right-click on the directory where your activities, go to New > Java Class. This class will consist of your image name and image URL.
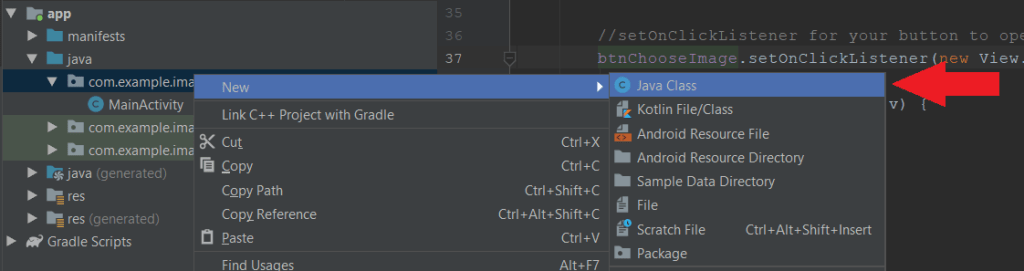
Name your Java class Upload and click “Ok”.
Next copy and paste this code into your newly created Java class.
package com.example.imageupload;

public class Upload {
    private String mName;
    private String mImageUrl;

    public Upload() {
        //empty constructor needed
    }

    public Upload(String name, String imageUrl) {
        if (name.trim().equals("")) {
            name = "No Name";
        }

        mName = name;
        mImageUrl = imageUrl;
    }

    public String getName() {
        return mName;
    }

    public void setName(String name) {
        mName = name;
    }

    public String getImageUrl() {
        return mImageUrl;
    }

    public void setImageUrl(String imageUrl) {
        mImageUrl = imageUrl;
    }
}
Next, back to your main page, copy and paste the highlighted lines inside your code. Again, there is a brief explanation in the commented lines so look out for those if you want to know more about what these lines of code do.
package com.example.imageupload;

import androidx.annotation.NonNull;
import androidx.appcompat.app.AppCompatActivity;

import android.content.ContentResolver;
import android.content.Intent;
import android.net.Uri;
import android.os.Bundle;
import android.os.Handler;
import android.view.View;
import android.webkit.MimeTypeMap;
import android.widget.Button;
import android.widget.EditText;
import android.widget.ImageView;
import android.widget.Toast;

import com.google.android.gms.tasks.OnFailureListener;
import com.google.android.gms.tasks.OnSuccessListener;
import com.google.firebase.database.DatabaseReference;
import com.google.firebase.database.FirebaseDatabase;
import com.google.firebase.storage.FirebaseStorage;
import com.google.firebase.storage.StorageReference;
import com.google.firebase.storage.StorageTask;
import com.google.firebase.storage.UploadTask;
import com.squareup.picasso.Picasso;

public class MainActivity extends AppCompatActivity {

    EditText etImageName;
    Button btnChooseImage, btnUpload, btnViewAll;
    ImageView imgToUpload;

    //Declare these 2 variables
    private static final int PICK_IMAGE_REQUEST = 1;
    private Uri mImageUri;

    //Declare these 3 new variables
    private StorageReference mStorageRef;
    private DatabaseReference mDatabaseRef;
    private StorageTask mUploadTask;

    @Override
    protected void onCreate(Bundle savedInstanceState) {
        super.onCreate(savedInstanceState);
        setContentView(R.layout.activity_main);

        etImageName = findViewById(R.id.etImageName);
        btnChooseImage = findViewById(R.id.btnChooseImage);
        btnUpload = findViewById(R.id.btnUpload);
        btnViewAll = findViewById(R.id.btnViewAll);
        imgToUpload = findViewById(R.id.imgToUpload);

        //this means that the images will be uploaded to a folder called "uploads"
        mStorageRef = FirebaseStorage.getInstance().getReference("uploads");
        mDatabaseRef = FirebaseDatabase.getInstance().getReference("uploads");

        //setOnClickListener for your button to open gallery and choose image
        btnChooseImage.setOnClickListener(new View.OnClickListener() {
            @Override
            public void onClick(View v) {
                openFileChooser();
            }
        });

        //setOnClickListener for your button to upload the image you selected
        btnUpload.setOnClickListener(new View.OnClickListener() {
            @Override
            public void onClick(View v) {
                //to avoid spam uploading
                if (mUploadTask != null && mUploadTask.isInProgress()) {
                    Toast.makeText(MainActivity.this, "Upload in progress", Toast.LENGTH_SHORT).show();
                } else {
                    uploadFile();
                }
            }
        });
    }

    //method to open gallery
    private void openFileChooser() {
        Intent intent = new Intent();
        intent.setType("image/*");
        intent.setAction(Intent.ACTION_GET_CONTENT);
        startActivityForResult(intent, PICK_IMAGE_REQUEST);
    }

    //this method will set ur ImageView to the image you chose
    @Override
    protected void onActivityResult(int requestCode, int resultCode, Intent data) {
        super.onActivityResult(requestCode, resultCode, data);

        if (requestCode == PICK_IMAGE_REQUEST && resultCode == RESULT_OK
                && data != null && data.getData() != null) {
            mImageUri = data.getData();

            Picasso.get().load(mImageUri).into(imgToUpload);
        }
    }

    //this method will return the extension of your image
    private String getFileExtension(Uri uri) {
        ContentResolver cR = getContentResolver();
        MimeTypeMap mime = MimeTypeMap.getSingleton();
        return mime.getExtensionFromMimeType(cR.getType(uri));
    }

    private void uploadFile() {
        //to check if you actually picked an image
        if (mImageUri != null) {
            //to get a unique file name for each image upload, so that you will not overwrite any images
            StorageReference fileReference = mStorageRef.child(System.currentTimeMillis()
                    + "." + getFileExtension(mImageUri));
            mUploadTask = fileReference.putFile(mImageUri)
                    .addOnSuccessListener(new OnSuccessListener<UploadTask.TaskSnapshot>() {
                        @Override
                        public void onSuccess(UploadTask.TaskSnapshot taskSnapshot) {
                            Handler handler = new Handler();
                            handler.postDelayed(new Runnable() {
                                @Override
                                public void run() {

                                }
                            }, 500);
                            Toast.makeText(MainActivity.this, "Upload successful", Toast.LENGTH_LONG).show();
                            //creating a new upload item
                            Upload upload = new Upload(etImageName.getText().toString().trim(),
                                    taskSnapshot.getMetadata().getReference().getDownloadUrl().toString());
                            //creating a new entry in your database to save the metadata of your image with a unique id
                            String uploadId = mDatabaseRef.push().getKey();
                            //setting the unique id setting the data to your uploaded image containing your image name + url
                            mDatabaseRef.child(uploadId).setValue(upload);
                        }
                    })
                    .addOnFailureListener(new OnFailureListener() {
                        @Override
                        public void onFailure(@NonNull Exception e) {
                            Toast.makeText(MainActivity.this, e.getMessage(), Toast.LENGTH_SHORT).show();
                        }
                    });

        } else {
            Toast.makeText(this, "No image selected!", Toast.LENGTH_SHORT).show();
        }
    }
}
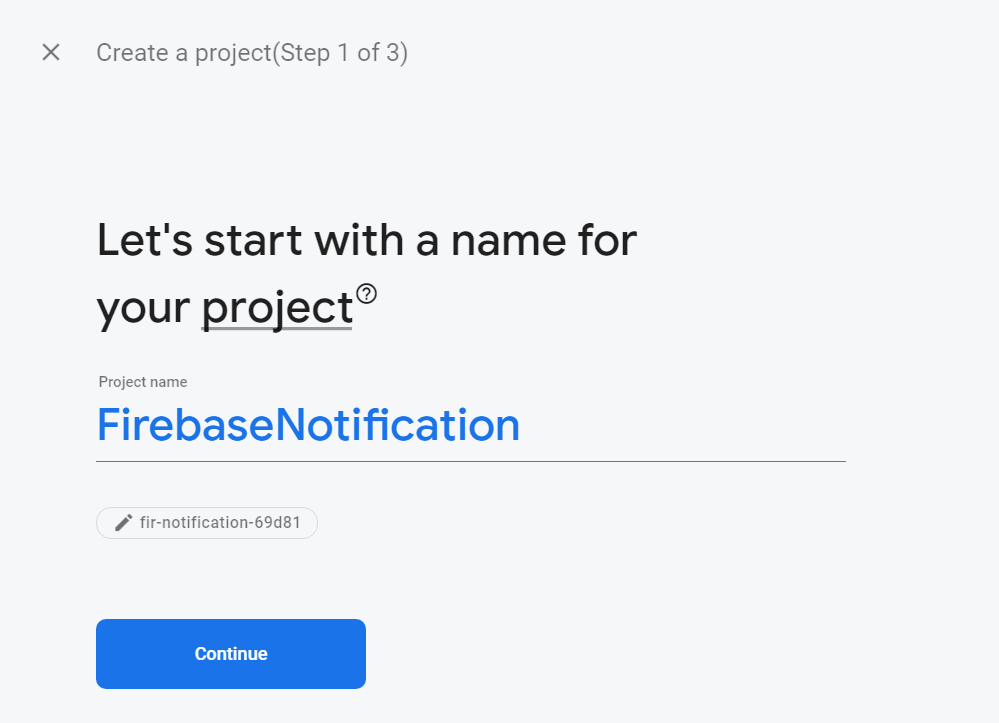
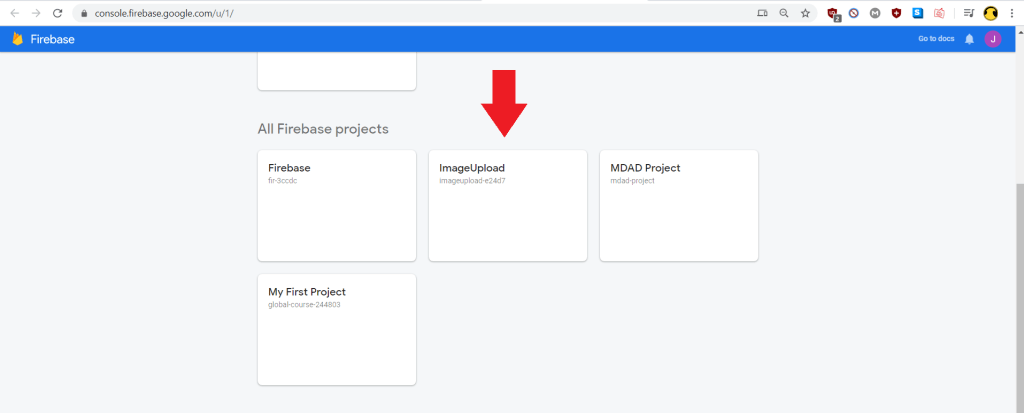
After that, go back to your Firebase console at https://console.firebase.google.com/ and click on your project. If you did not change anything in the set up earlier, your project name in Firebase should be your project name in Android Studio.
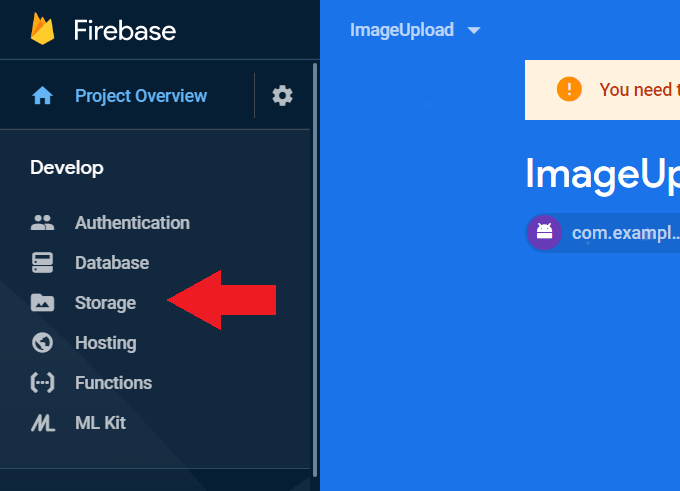
Once you are in your project, on the left side of the page, click on “Storage”
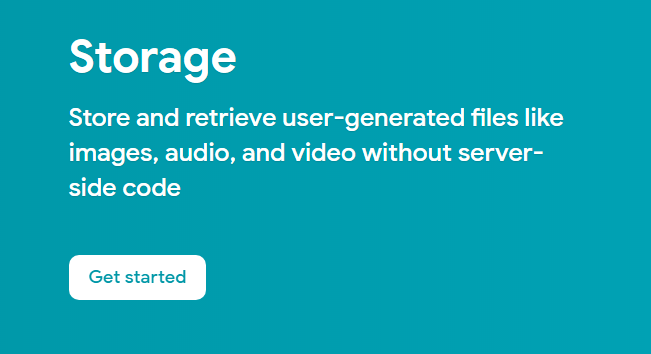
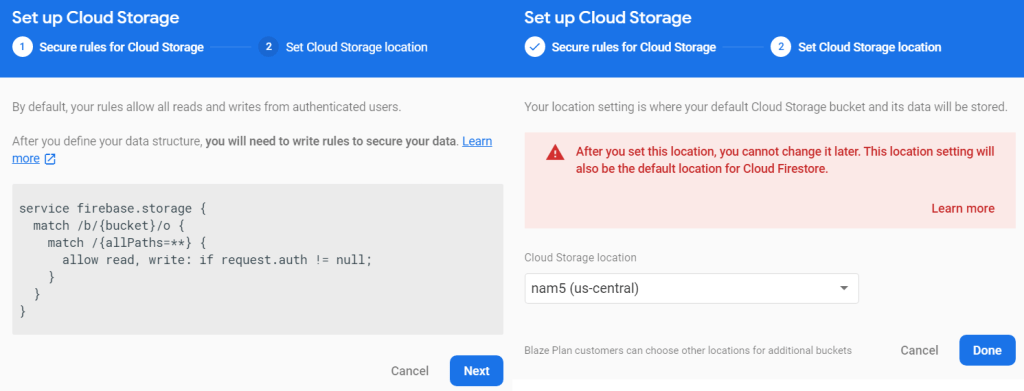
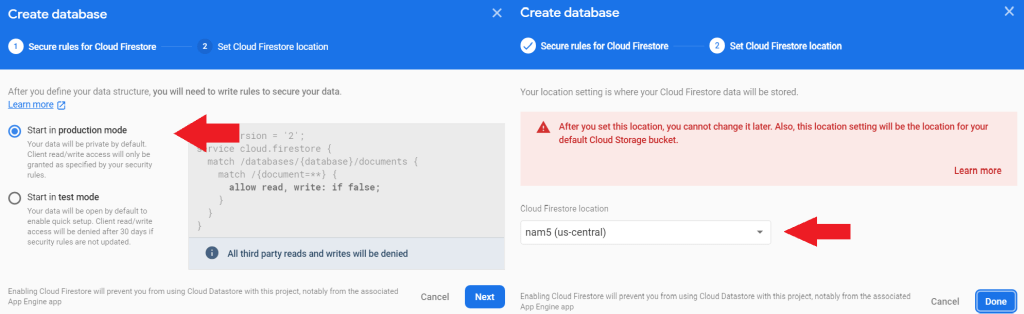
Next click on “Get Started” and go through the setup.
For part 2, you can leave the Cloud Storage location as it is and press “Done”.
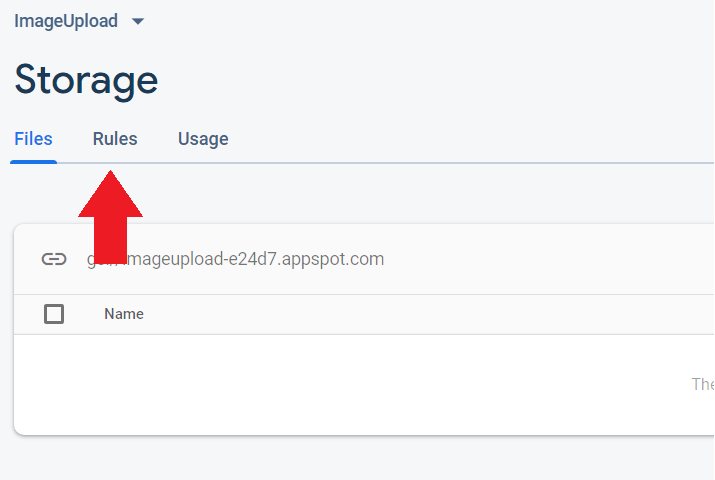
Once you are in the Storage page, click on “Rules”.
Initially, your rules will look like this:
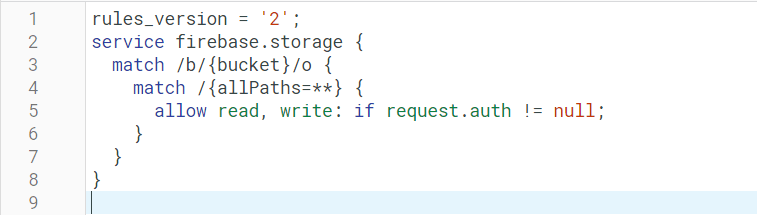
But change it to be like this:

And click “Publish”.
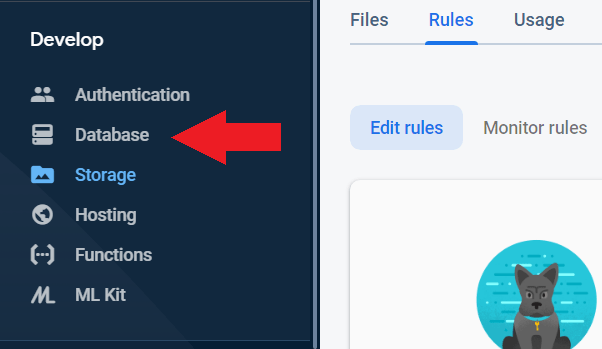
Next, click on Database on the left panel.
Click on “Create database”.

Leave the settings as they are and click “Done”.
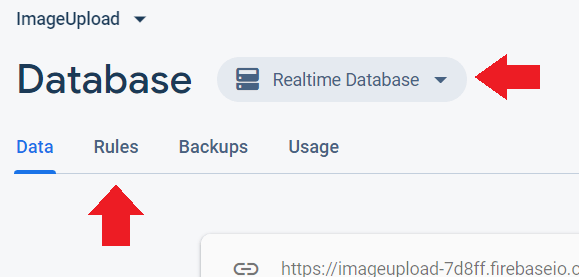
When its done, make sure you are on “Realtime Database” and go to “Rules”.
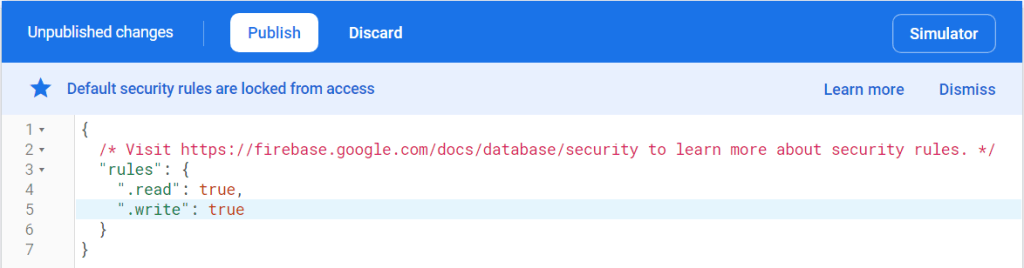
Initially your rules will look like this:

But change it to this and click “Publish”:
You can now upload images to Firebase! Here is a demo of what it should look like if you did everything correctly.
And here is what your Firebase Storage and Database would look like after uploading.
Uploading your Image Path and Image Name to MySQL using PHP
In my MySQL phpMyAdmin, I have created this table as an example.
CREATE TABLE Images (
    ImageID int AUTO_INCREMENT NOT NULL,
    ImageName varchar(255) NOT NULL,
    ImageURL varchar(255) NOT NULL,
    PRIMARY KEY (ImageID)
    );
Here is how my file looks like to be able to upload the ImageName and ImageURL to my MySQL database.
<?php

$json = file_get_contents('php://input');
$json_object = json_decode($json, true);

$ImageName = $json_object['ImageName'];
$ImageURL = $json_object['ImageURL'];

$response = array();

require_once __DIR__ . '/db_connect.php';
$myConnection= new DB_CONNECT();
$myConnection->connect();

$sqlCommand = "INSERT INTO Images (ImageName, ImageURL) VALUES ('$ImageName', '$ImageURL')";
$result =mysqli_query($myConnection->myconn, "$sqlCommand");

if ($result) {

        $response["success"] = 1;
        $response["message"] = "Image successfully uploaded.";
        echo json_encode($response);

} else {

        $response["success"] = 0;
        $response["message"] = "Oops! An error occurred.";
        echo json_encode($response);

}

?>
Lastly, copy and paste the new highlighted parts to your code.
package com.example.imageupload;

import androidx.annotation.NonNull;
import androidx.appcompat.app.AppCompatActivity;

import android.content.ContentResolver;
import android.content.Intent;
import android.net.Uri;
import android.os.Bundle;
import android.os.Handler;
import android.util.Log;
import android.view.View;
import android.webkit.MimeTypeMap;
import android.widget.Button;
import android.widget.EditText;
import android.widget.ImageView;
import android.widget.Toast;

import com.android.volley.Request;
import com.android.volley.RequestQueue;
import com.android.volley.Response;
import com.android.volley.VolleyError;
import com.android.volley.toolbox.JsonObjectRequest;
import com.android.volley.toolbox.Volley;
import com.google.android.gms.tasks.OnFailureListener;
import com.google.android.gms.tasks.OnSuccessListener;
import com.google.firebase.database.DatabaseReference;
import com.google.firebase.database.FirebaseDatabase;
import com.google.firebase.storage.FirebaseStorage;
import com.google.firebase.storage.StorageReference;
import com.google.firebase.storage.StorageTask;
import com.google.firebase.storage.UploadTask;
import com.squareup.picasso.Picasso;

import org.json.JSONException;
import org.json.JSONObject;

public class MainActivity extends AppCompatActivity {

    EditText etImageName;
    Button btnChooseImage, btnUpload, btnViewAll;
    ImageView imgToUpload;

    //declare these 2 variables
    private static final int PICK_IMAGE_REQUEST = 1;
    private Uri mImageUri;

    //declare these 3 new variables
    private StorageReference mStorageRef;
    private DatabaseReference mDatabaseRef;
    private StorageTask mUploadTask;

    //declare php url
    private static final String url = "http://vetmdad.atspace.cc/uploadImage.php";

    //declare the tags
    private static final String TAG_SUCCESS = "success";
    private static final String TAG_IMAGENAME = "ImageName";
    private static final String TAG_IMAGEURL = "ImageURL";

    @Override
    protected void onCreate(Bundle savedInstanceState) {
        super.onCreate(savedInstanceState);
        setContentView(R.layout.activity_main);

        etImageName = findViewById(R.id.etImageName);
        btnChooseImage = findViewById(R.id.btnChooseImage);
        btnUpload = findViewById(R.id.btnUpload);
        btnViewAll = findViewById(R.id.btnViewAll);
        imgToUpload = findViewById(R.id.imgToUpload);

        //this means that the images will be uploaded to a folder called "uploads"
        mStorageRef = FirebaseStorage.getInstance().getReference("uploads");
        mDatabaseRef = FirebaseDatabase.getInstance().getReference("uploads");

        //setOnClickListener for your button to open gallery and choose image
        btnChooseImage.setOnClickListener(new View.OnClickListener() {
            @Override
            public void onClick(View v) {
                openFileChooser();
            }
        });

        //setOnClickListener for your button to upload the image you selected
        btnUpload.setOnClickListener(new View.OnClickListener() {
            @Override
            public void onClick(View v) {
                //to avoid spam uploading
                if (mUploadTask != null && mUploadTask.isInProgress()) {
                    Toast.makeText(MainActivity.this, "Upload in progress", Toast.LENGTH_SHORT).show();
                } else {
                    uploadFile();
                }
            }
        });
    }

    //method to open gallery
    private void openFileChooser() {
        Intent intent = new Intent();
        intent.setType("image/*");
        intent.setAction(Intent.ACTION_GET_CONTENT);
        startActivityForResult(intent, PICK_IMAGE_REQUEST);
    }

    //this method will set ur ImageView to the image you chose
    @Override
    protected void onActivityResult(int requestCode, int resultCode, Intent data) {
        super.onActivityResult(requestCode, resultCode, data);

        if (requestCode == PICK_IMAGE_REQUEST && resultCode == RESULT_OK
                && data != null && data.getData() != null) {
            mImageUri = data.getData();

            Picasso.get().load(mImageUri).into(imgToUpload);
        }
    }

    //this method will return the extension of your image
    private String getFileExtension(Uri uri) {
        ContentResolver cR = getContentResolver();
        MimeTypeMap mime = MimeTypeMap.getSingleton();
        return mime.getExtensionFromMimeType(cR.getType(uri));
    }

    private void uploadFile() {
        //to check if you actually picked an image
        if (mImageUri != null) {
            //to get a unique file name for each image upload, so that you will not overwrite any images
            //added final
            final StorageReference fileReference = mStorageRef.child(System.currentTimeMillis()
                    + "." + getFileExtension(mImageUri));
            mUploadTask = fileReference.putFile(mImageUri)
                    .addOnSuccessListener(new OnSuccessListener<UploadTask.TaskSnapshot>() {
                        @Override
                        public void onSuccess(UploadTask.TaskSnapshot taskSnapshot) {
                            Handler handler = new Handler();
                            handler.postDelayed(new Runnable() {
                                @Override
                                public void run() {

                                }
                            }, 500);
                            Toast.makeText(MainActivity.this, "Upload successful", Toast.LENGTH_LONG).show();
                            //creating a new upload item
                            Upload upload = new Upload(etImageName.getText().toString().trim(),
                                    taskSnapshot.getMetadata().getReference().getDownloadUrl().toString());
                            //creating a new entry in your database to save the metadata of your image with a unique id
                            String uploadId = mDatabaseRef.push().getKey();
                            //setting the unique id setting the data to your uploaded image containing your image name + url
                            mDatabaseRef.child(uploadId).setValue(upload);
                            //retrieving image url
                            fileReference.getDownloadUrl().addOnSuccessListener(new OnSuccessListener<Uri>() {

                                @Override
                                public void onSuccess(Uri uri) {
                                    Uri downloadUrl = uri;

                                    JSONObject dataJson = new JSONObject();
                                    try {

                                        dataJson.put(TAG_IMAGENAME, etImageName.getText().toString());
                                        dataJson.put(TAG_IMAGEURL, downloadUrl.toString());

                                    } catch (Exception e) {
                                        e.printStackTrace();
                                    }
                                    postData(url, dataJson, 1);
                                }
                            });
                        }
                    })
                    .addOnFailureListener(new OnFailureListener() {
                        @Override
                        public void onFailure(@NonNull Exception e) {
                            Toast.makeText(MainActivity.this, e.getMessage(), Toast.LENGTH_SHORT).show();
                        }
                    });

        } else {
            Toast.makeText(this, "No image selected!", Toast.LENGTH_SHORT).show();
        }
    }

    public void postData(String url, final JSONObject json, final int option) {
        RequestQueue requestQueue = Volley.newRequestQueue(this);
        JsonObjectRequest json_obj_req = new JsonObjectRequest(
                Request.Method.POST, url, json, new Response.Listener<JSONObject>() {
            @Override
            public void onResponse(JSONObject response) {
                switch (option) {
                    case 1:
                        checkResponse(response);
                        break;
                }
            }
        }, new Response.ErrorListener() {
            @Override
            public void onErrorResponse(VolleyError error) {
                error.printStackTrace();
            }
        });
        requestQueue.add(json_obj_req);
    }

    public void checkResponse(JSONObject response) {
        Log.i("----Response", response + " ");
        try {
            if (response.getInt(TAG_SUCCESS) == 1) {

            } else {

            }
        } catch (JSONException e) {
            e.printStackTrace();
        }
    }
}
You can now upload the image URL and image name to MySQL! If you did everything correctly, this is what your MySQL table should look like after uploading a new image.
Do be sure to not copy the code blindly or that might lead to some problems. To be able to retrieve the image from your image URL and display it on your app, please refer to this other tutorial :
This tutorial was heavily referenced from: shorturl.at/cuvxM